


 Why This Story Matters
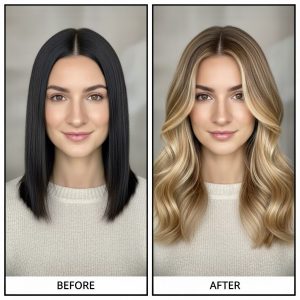
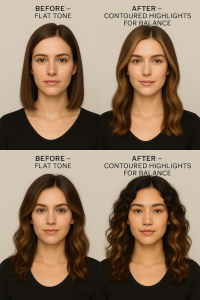
Most colour consultations start with one question: “What suits your skin tone?”
But there’s another dimension to hair colour that’s rarely discussed outside professional classrooms — the way light and shadow in your hair can rebalance your facial features themselves.
Welcome to hair contouring 2.0, where colour placement is used not just to match complexion, but to subtly enhance proportions — your eyes, nose, cheekbones, and jawline.
It’s the most artistic form of colour science, and it’s quietly shaping the next wave of bespoke colour design.
1 | The Origins of Hair Contouring
The concept of “contouring” began with makeup: adding light to bring forward and shadow to recede.
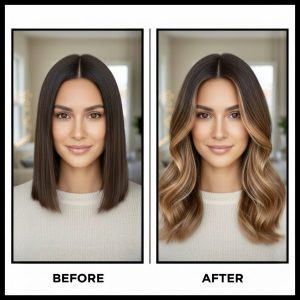
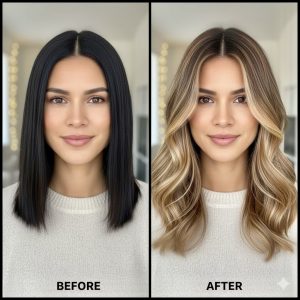
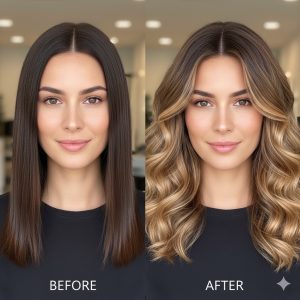
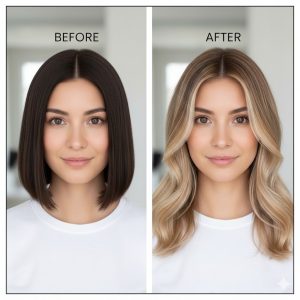
L’Oréal Professionnel first applied it to hair in 2016 under the term colour contouring. The goal was simple — use tone gradients to sculpt the face.
Today, advanced stylists have evolved it further. Instead of working only by face shape (oval, round, square), they map colour around individual features.
Think of it as soft-focus photography made permanent through colour.
2 | The Science: How Light Shapes Perception
Human vision reads lightness and contrast faster than any other detail.
Peer-reviewed studies in Journal of Vision (Russell et al., 2019) and Vision Research (Zhao & Bülthoff, 2021) confirm that brightness gradients near the face change how we perceive size and symmetry.
When hair colour changes the brightness field around the face, it can:
- draw attention outward (creating width)
- lift the gaze upward (elongating)
- soften angularity through diffusion.
Stylists use this psychology every day — even if they don’t quote the journals.

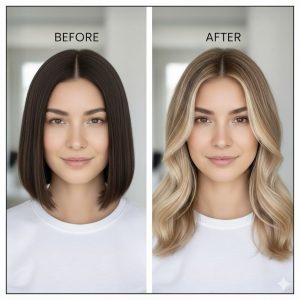
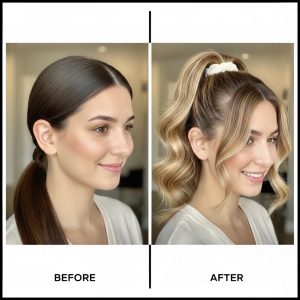
3 | Feature-Focused Colour Placement
Below is how professionals translate optical logic into highlight strategy.
These are creative guidelines, not medical rules, but they work remarkably consistently.
Each adjustment works because our eyes instinctively follow light. Where colour brightens, attention follows; where tone deepens, attention rests.
1. Wider Nose
Highlights placed at the temples and outer face draw the viewer’s eye outward, creating a more balanced central focus and making the nose appear more proportionate.

2. Deep-Set / Small Eyes
Fine highlights sweeping toward the temples and fringe add brightness near the eyes, creating an immediate optical lift and making them appear more open.

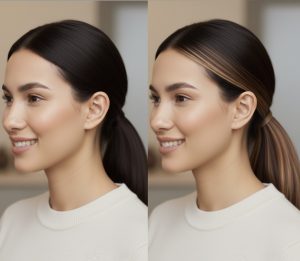
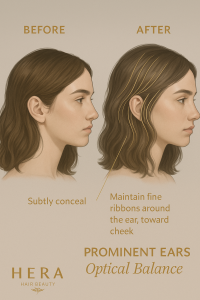
3. Prominent Ears
Brighter face-framing highlights pull attention forward, while a subtle, deeper lowlight just behind the ear line helps them visually recede.
4. Wide Forehead
A soft “root shadow” at the hairline visually compresses the forehead’s height, while highlights through the mid-lengths draw the eye downward.
5. Strong Jaw / Chin
Sun-kissed highlights placed in the mid-lengths (intentionally above the chin line) draw attention upward, which helps to soften the entire jawline.
6. High Cheekbones
To complement—not exaggerate—this feature, balayage is kept soft and starts just below the cheekbone line, maintaining beautiful and natural proportions.
7. Delicate Features
A soft halo of “babylights” or micro-balayage adds gentle radiance and definition, enhancing the face without overpowering its fine features.
Wider Nose
Goal: Rebalance central focus
Strategy: Keep centre/part slightly deeper; add subtle highlights at temples and outer face.
Expected Visual Effect: Viewer’s eye travels outward → nose appears more proportionate within the frame.
Deep-Set / Small Eyes
Goal: Open and lift
Strategy: Add fine highlights sweeping from crown toward temples/fringe; avoid heavy depth above eyes.
Expected Visual Effect: Brightness near orbital area creates optical openness and lift.
Prominent Ears
Goal: Subtly conceal
Strategy: Maintain lowlight just behind ear line; keep brighter face-frame pieces toward front hairline.
Expected Visual Effect: Dark recedes, light advances → ears feel visually tucked.
Wide Forehead
Goal: Shorten vertically
Strategy: Soft root-shadow melt around the first 1–2 cm of hairline; keep brightness through mid-lengths.
Expected Visual Effect: Compresses height and balances the upper third of the face.
Strong Jaw / Chin
Goal: Soften edge
Strategy: Place sun-kissed light in mid-lengths; keep ends slightly deeper; avoid blunt light at chin level.
Expected Visual Effect: Attention shifts upward; lower silhouette reads softer.
High Cheekbones
Goal: Avoid exaggeration
Strategy: Begin balayage below the cheekbone line; keep face-frame light soft and diffused.
Expected Visual Effect: Proportions stay natural in photos; avoids mid-face over-width.
Delicate Features
Goal: Add definition
Strategy: Micro-balayage/babylights around fringe & temples; higher light-to-shadow ratio for a soft halo.
Expected Visual Effect: Gentle radiance and structure without overpowering fine features.
Note: Note: Effects described are optical (perception) rather than anatomical changes. Techniques should be customised to hair texture, density, and lifestyle.
4 | Why It Matters for Asian and Tropical Clients
Singapore’s humidity, UV exposure, and prevalent Asian facial structures give this approach unique relevance.
Research in regional aesthetic medicine shows that East-Asian bone morphology often includes softer jawlines and broader cheek areas.
By placing vertical ribbons — lighter strokes running top to bottom instead of horizontal — stylists create lift and elongation, balancing these natural proportions while respecting texture.
It’s a subtler, more climate-friendly form of contouring than heavy balayage used in drier Western climates.
5 | The Tools of Precision
Modern contour colouring relies on technology as much as artistry.
- Micro-section foiling for millimetre control around facial planes
- Freehand balayage brushes for softness on high points
- Shadow-melt formulas blending semi-permanent and demi-permanent tones for realistic depth
- Gloss toners that adjust brightness by a single value level without stripping pigment
The goal is to mimic natural light fall — not to paint stripes.
That’s why top salons photograph clients under neutral light during consultations: to read how natural shadows already sculpt the face before adding colour.
6 | Creating a Bespoke Plan: The Stylist’s Eye
A professional colourist will analyse three zones before applying a single foil:
- Vertical Balance – Is the visual weight concentrated high or low?
- Horizontal Balance – Are features centrally dominant or peripheral?
- Feature Focus – What does the client want to highlight or soften?
Only then is the palette chosen — usually two highlight tones and one lowlight for contrast control.
It’s couture colouring, not cookie-cutter salon work.
7 | Realistic Expectations
Hair contouring refines perception; it doesn’t “change” your face.
That’s the ethical boundary every professional should maintain.
Light and shadow shift how the viewer’s eye moves — a gentle illusion, not transformation surgery.
When explained honestly, clients feel empowered rather than sold to.
8 | How to Maintain the Effect
- Gloss refresh every 6–8 weeks keeps brightness precise.
- Root touch-shadow maintains balance as hair grows.
- Avoid heavy toners that flatten contrast — depth is what creates contour.
- Condition with colour-safe hydrators so cuticle reflection stays even; frizz scatters light and breaks the illusion.

9 | The Consultation Conversation
The most professional stylists now ask questions such as:
“Is there a feature you’d like to soften or bring forward?”
“Do you prefer light near your temples or near your cheekbones?”
These subtleties open dialogue about self-image rather than just trend adoption.
It’s also the best way to avoid disappointment: the technique becomes personal, not prescriptive.
10 | A Gentle Note on Psychology
Facial self-perception is emotional terrain.
When colour helps clients feel more balanced or expressive, it can genuinely uplift confidence.
But it must never imply that any feature needs “correction.”
The purpose of hair contouring is harmony — celebrating individuality through artistic framing, not hiding imperfection.
That’s where beauty meets ethics.
11 | Why This Topic Feels New
Search engines are full of guides linking colour to skin tone.
Almost none explore the interplay of individual features, optical science, and modern contour placement — especially for Asian climates.
By merging artistic intuition with proven visual psychology, stylists are opening a fresh chapter in colour design.
It’s not a fad; it’s a philosophy: let light do the flattering.
12 | References (for Transparency)
- Modern Salon (2023). “Colour Contouring: How to Customise Highlights to Face Shape.”
- Makeup.com (2024). “Highlight Placement by Face Shape.”
- Russell, R. et al. (2019). Journal of Vision, “Contrast and Facial Perception.”
- Zhao & Bülthoff (2021). Vision Research, “Contextual Lightness and Facial Judgement.”
- Journal of Cosmetic Science (2022). “Advances in Demi-Permanent Blending for Dimensional Colour.”
- Singapore Aesthetic Society Review (2023). “Regional Facial Mo rphology and Perceptual Balance.”
Closing Reflection: Light as Language
Every strand that catches light tells a story about where you want attention to go — up, out, forward, or softly within.
When colour is placed with purpose, it speaks a quiet language of balance and self-assurance.
So the next time you sit for a consultation, don’t just ask what shade flatters your skin.
Ask:
“Where should the light fall to flatter me?”
That’s the essence of hair contouring beyond face shape — the art of shaping confidence through colour.
Leave A Comment