


We’ve All Been There
You spend an hour layering creams, gels, and prayers.
Every curl clumps perfectly. You diffuse, you wait… and it dries flat at the roots — shiny, yes, but helmet-flat.
The next wash day, you fluff for that big “wow” volume, only to meet your old enemy by lunchtime: frizz.
Welcome to the single most frustrating trade-off in curl care — volume versus definition.
But here’s the truth, straight from stylists, chemists, and curl scientists alike:
It’s not a curse. It’s a balance equation.
Once you understand how cut, chemistry, and technique work together, you can get both — airy lift and glossy definition — without breaking physics.

The Science Behind the Myth
Hair behaves like an architectural material.
- Definition comes from alignment: when fibers stick together in uniform bundles and light reflects evenly.
- Volume comes from expansion: air between curls, root lift, and bundle separation.
The two are naturally opposing forces, but they’re not mutually exclusive.
You can’t have 100 % of both, but you can hit a 90/90 balance — the point where curls look full, light, and polished at once.
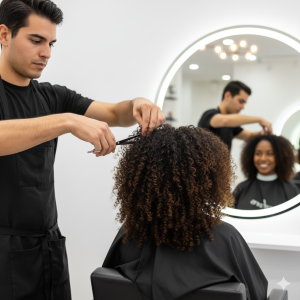
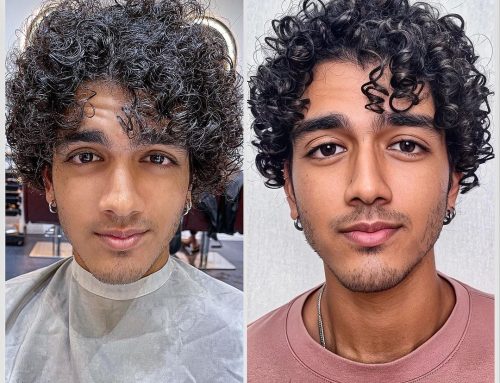
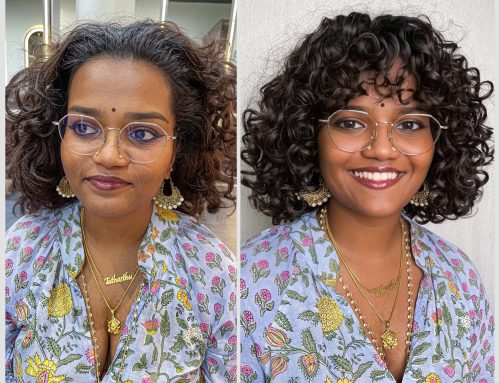
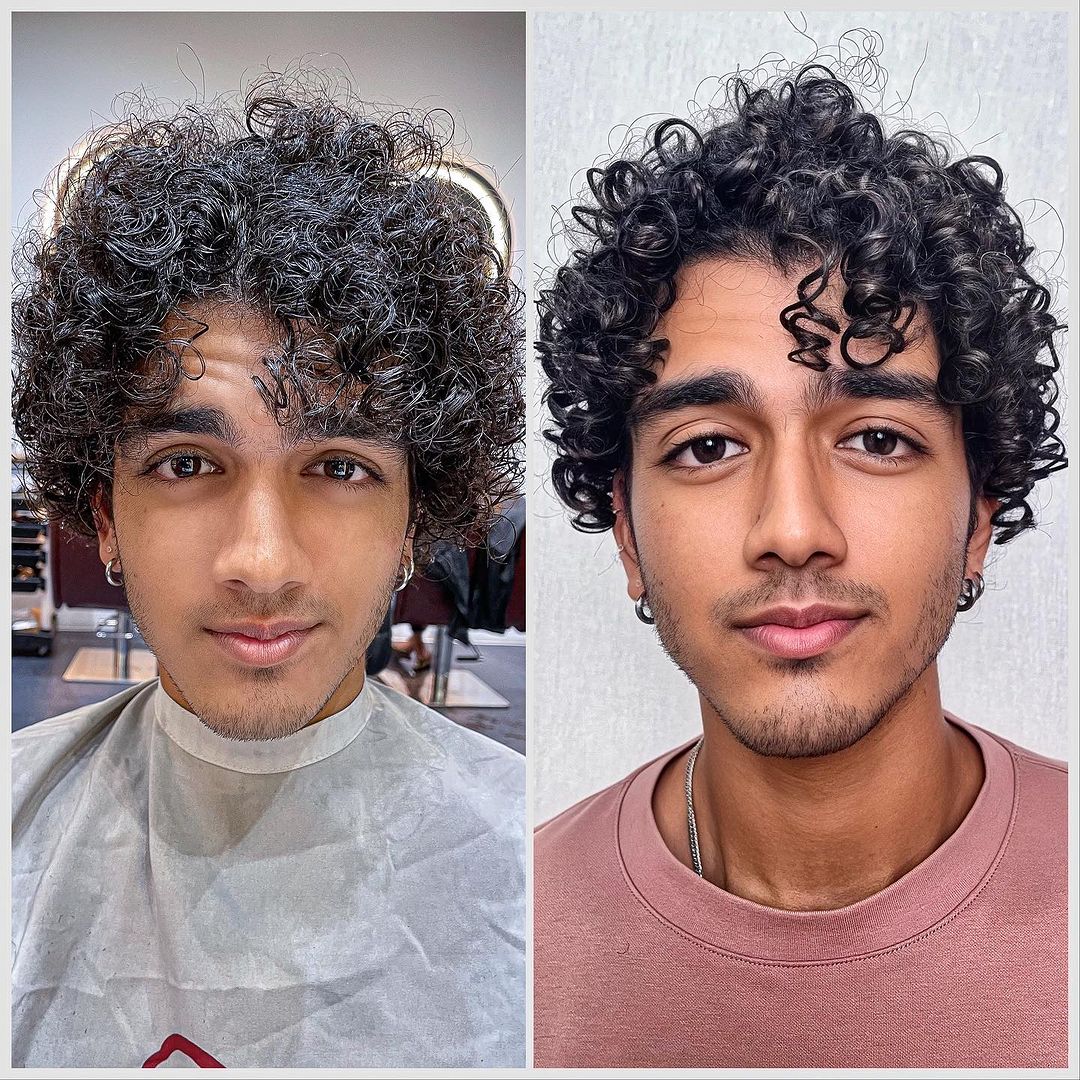
Step 1. The Foundation: Your Cut Is 90 % of Your Volume
Hard truth: no amount of mousse can fix a heavy, single-length cut.
If your hair is one block of weight, gravity wins.
A well-designed cut creates built-in air flow — invisible architecture that lets curls lift and move.
What usually goes wrong:
A “one-size-fits-all” curly cut ignores your density and pattern, producing the dreaded triangle shape or root collapse.
The expert solution:
Ask for seamless, interior layers that remove hidden bulk while keeping external shape intact. This “air-scaffolding” makes volume effortless; your hair naturally wants to lift instead of fall.
Why it works (science bit):
Removing internal weight shortens the lever arm of gravity. Each curl coil retains its natural spring, so you get vertical lift without extra product.
Step 2. The Secret: Treat Roots and Ends as Two Different Worlds
Your roots and your ends live by opposite rules — yet most people coat them in one heavy product from root to tip.
Common mistake:
One dense gel everywhere → roots glued to scalp, ends overloaded, curls droop.
The professional fix: Product Zoning
| Zone | Goal | Best Texture/Product | Why It Works |
| Roots | Lift & airflow | Lightweight foam or volumizing mousse | Low-solid polymers form flexible films that expand with heat, keeping lift at the scalp. |
| Mid-lengths → Ends | Definition & shine | High-definition gel or cream | Stronger fixatives (acrylates, polyurethanes) align strands and lock curl memory. |
You’re combining two polymer behaviors: flexible hold at the roots, firm alignment at the ends.
Light where you want air, structure where you need control.
Step 3. The Finish: Fluff the Roots — Never the Curls
That crunchy gel cast you feel after drying? That’s your definition insurance policy.
Common mistake:
Aggressively scrunching everywhere — breaking the cast and the clumps.
Expert technique: “Fluff & Set”
- Scrunch Out the Crunch (SOTC) — Gently press ends once curls are fully dry to soften the cast.
- Flip & Fluff — Using fingertips or a pick, lift only at the scalp. Shake the roots, not the strands.
- Set — Let the new air space cool before touching again. Heat + motion = frizz; cool + stillness = lasting lift.
Science note:
When the polymer film is dry, it becomes glass-like. Breaking it selectively at the roots injects air pockets while leaving end-clumps intact — that’s how you keep definition and volume simultaneously.
Step 4. Bonus Science — The Environment Factor
- In dry climates: Add humectant layers under your gel to prevent static and fly-away lift.
- In humid climates: Choose humidity-resistant polymers (look for Polyquaternium-69, PU hybrids, or “humidity-proof hold” labels). These keep the film flexible instead of sticky when moisture hits.
- Universal rule: Always dry completely before leaving the house — half-dry curls + humidity = chaos.
Different Curl Families, Same Logic
| Type | Key Focus | Tweak for 90/90 Balance |
| 2A–2C (Wavy) | Prevent collapse | Use mousse first, micro-dose gel only on ends. Diffuse upside-down. |
| 3A–3C (Curly) | Control + bounce | Gel mid-lengths → mousse roots → 80 % dry → SOTC → fluff roots. |
| 4A–4C (Coily) | Shape & humidity defense | Use humidity-resistant gel; stretch roots gently; pick only when fully dry. |
Different geometry, same law: control at ends, air at roots.
Step 5. Mindset: Mastery > Miracle
The “holy grail” isn’t in a bottle; it’s in the choreography:
- Architectural cut
- Zoned product logic
- Smart finishing physics
Once you master those three, every wash day becomes predictable — and personal.
The Emotional Truth
Perfect curls aren’t about defying physics; they’re about working with it.
Your texture doesn’t need taming — it needs understanding.
When you stop chasing extremes and start balancing forces, you discover what stylists already know:
Your curls can’t break physics — but they can bend it beautifully.
FAQ Quick-Hits
- Can I really get both 100 % volume and definition?
Physics says no, but the right cut + product zoning can get you within striking distance — the 90/90 zone. - Why do my roots go flat?
Too much product or not enough internal layering. - Why do my curls puff out?
Over-fluffing before the cast sets or humidity softening the film. - What’s the best diffuser technique?
Set still until cast forms, then move for root lift.
Sources for the Science-Minded
- Polymer and film-former fundamentals in curl retention tests (Cosmetic & Toiletries Journal).
- Humidity-resistant fixatives such as Polyquaternium-69 and PU hybrids (manufacturer white papers).
- NaturallyCurly.com — for curl-type education and texture science.
Final Word
You don’t need to choose between bounce and polish.
You just need to design for both — from the cut to the chemistry to the cooldown.
Because the true holy grail of curls isn’t a product.
It’s a partnership between science, craft, and you.
Learn more about our signature approach to curls on the Curly Hair Salon Singapore page.

Leave A Comment